News and Events

Keep up to date with the latest news and events of Modular Bikes.

Saturday, September 29, 2018

New trike part 8

My wife Christine's......

brother Tom came over.....go West Coast!
Seat refurb.  The part on top is a crushbar stopping the lower part of the seat from destroying itself as provided in the NC routed seat kit I designed.

After a blocky.

Bits of bling and the Aheadset.
Orange bling at the front.


Hi

See previous post here

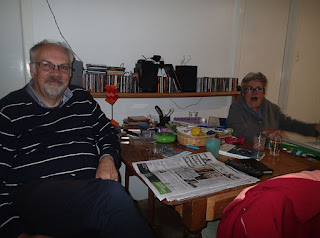
Today, my wife Christine's brother Tom came over and we all watched parts of the AFL grand final.  West Coast played really well, and overtook Collingwood despite Collingwood having a 5 goal lead early on.  I was working on my trikes, refurbing an old-design, heavy but still good tailbox so it can be used on one of my trikes that's on the road at the moment, so I can steal its tailbox to use on the new trike.

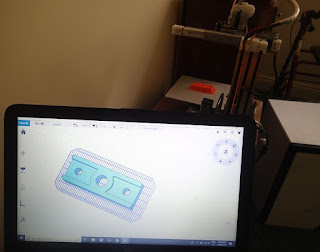
I between making the new bike and watching the TV, I was able to print some more orange bling, this time a pair of highlight rings for the front bottom bracket bolts.  There are actually 6 of these bolts, and I hope to bling them all eventually!

Anyway, I had the trike up off the ground, tuned the brakes, then put on the seat and at around 6pm did my first blocky on it.  First impressions were very good but the headset was coming loose and I still need to work on that a bit.

(Continued here)

Rest in Peace my aunt Lorna Baulch, a life well lived.

Best Wishes

Steve Nurse

Friday, September 28, 2018

New trike part 7

Frame and wheels done.

Borrowed seat on board, this was to check the steerer length and height. I was contemplating using the fibreglass seat shown in the foreground as trialled on this speedy version,  but opted against it, and am doing a switcheroo to use one of my own, nc routed timber seat instead.

Steerer....

Detail

75mm unicycle cranks for rear wheels.

Custom crankset unmodified.

Setting up to drill and tap the chainring for the extra inside chainguard.

Attaching the extra guard.

Now with added bling.

Anther "custom" chainring on a trike out the front. Suspect these things are breeding in my shed.


Last post here


Hi, Today (day-before-grand-final-day-holiday-in-Melbourne) I have been working on my trike again, gradually wrangling it into a rideable state.  The basics of the frame and forks and wheels are done, and now I'm connecting up the chain and cables, making an extra chainguard for the crankset and organising the seat.  I quite like the clean look of the 165mm "Custom" branded crankset I used for initial setup, and added and inside chain guard to it today by drilling and tapping into the chainring itself and bolting on a guard I found in the shed.  Not content with that, having decided to make orange a feature colour of the trike (reflectors are orange and its the colour in my 3d printer) I blinged out the crankset with some 3d printed orange dots. Because I can.

Continued here.

regards

Steve Nurse

Wednesday, September 26, 2018

New trike part 6


Hi, today's work on the trike included tightening 2 bottom brackets onto the frame, modding the 16" wheels slightly, shortening the wheel pins on the lathe, putting rim tape, tubes and tyres on the 16" wheels, and at the end of the day fitting all the wheels, and scoping how the steerer will fit.

To get the rear cranks, I grabbed parts from the first Fred Bike I made  five years ago and thought I'd take a few pics by way contrast with my current frame.

Regards

Steve Nurse

Tuesday, September 25, 2018

New trike part 5


Holesawing main frame, faraway, and

.........closeup.

Front frame and orange 3d printed separators and backing plates on rear frame.

Frame all assembed by day....

and by night complete with gaskets and bottom bracket bearings.
YST bottom bracket bearing and fibreglass crush bar inside rear frame.


Hi, here is today's progress on the trike frame.  Yesterday I had mostly finished the front part, and today I did finish it, putting a fibreglass / recycled tent frame crush bar across the inside of the tube so tightening the bottom bracket doesn't crush the aluminium rhs.  I repeated the feature on the main frame as well, and holesawed bearing casting holes in the main frame too.  From an old bike tube I made gaskets for between the 4 bearing castings and the frame.  So the frames all done and ready to take other trike parts.

Will report again soon.

Regards

Steve Nurse

Monday, September 24, 2018

New trike part 4

Graham Signorini and my wife Christine last night, amongst the other stuff on the table is the front part of the frame.

First thing this morning I printed this part, a catchplate for the spacer set.

Here are all the spacer parts & catchplates.

front frame profile complete

Cutting rear frame.....

All together, not much more to go on the frame.


Hi, since I wrote last time , I have progressed quite well on the trike frame, finishing the design of and 3d printing a full set of spacers which keep the 2 frame halves apart, cutting the main frame, and fitting the frame halves together.  There is one set of holes to go on the front for a bearing crush bar, and 2 sets on the back for bearings and crush bar. After that its done.

Quite pleased with the results, time will tell whether the reduced front frame size and spacer size will feel wobbly.  More soon, a days work should see the frame and wheels finishesd, the main task after that will be the seat.

Note: older larger versions of the front frame are shown here and here

Continued here

Regards  Steve Nurse 

Friday, September 21, 2018

New bike part 2

Starting the front of the frame.

Trial holesawing.

For-real holesawing

Steerer bearinghole, 1 done, 1 to go.

Wheels from Michael Rogan

Progress to date, next steps marked out.


Hi, for a day or so, I have been working on the frame of my new trike, and am starting with the front end.  As mentioned last time when I was making some of the parts, I have discussed making one of the pieces by 3d printing with Spee3d, the makers of aluminium-spray metal printers. So that is underway, but it could take a while, so I am not holding my breath for it, and am making a compatible piece by old-school methods.

Making a suitable drawing was the first step, then came drilling with hole saws.  I have a big, single-phase drill with an electonic variable-speed drive, which dials down to the low speeds needed, and that helps a lot. But I'm being cautious even so, and have tried all the holesaws on scrap aluminium before jumping in on the workpiece.  Head tube holes were made undersize and filed out 1 or 2mm all around, and I'm happy with the results. So a bit more sawing and filing to go.

This part is about 240mm long and the previous equivalent is 440mm so that is quite a reduction, but it will put more forces on the frame join, cross fingers it all works.

Some 349 wheels arrived from Michael Rogan at MR components trikes today, and unlike previous wheels which needed bearing replacement, these ones come with the right bearings and are very neat with the spoking on the inside of the hubs.  That saves me a bit of work, thanks Michael! More here.

Tuesday, September 18, 2018

Timber Chainguard

Victoria separating bike with timber chainguard on modded bike....

And on highly modded velocino.......

Still needs a bit of work!
Hi, in the last few days I've been working on a chainguard for my separating bike which is timber , and half hockey stick guard and half trouser guard.  Anyway, I think the idea is ok but this one needs more work, and to be a bit narrower.

It looks a bit better on the modded bike and not on the Velocino version.  You can only take in so much and the Velocino already has enough going on!

Anyway, I will continue on with this shortly. (More here!)

Regards

Steve Nurse

Thursday, September 13, 2018

A trip down the coast


Squeezed the bike into the train.

Near Anglesea on the....

Great Ocean Road
Edible Brassicas thriving.


Hi

At the end of last week I had finished a slab of writing for a conference paper and so planned to get away for a few days. Very fortunately my family has a place to stay on the West Coast of Victoria.  I wasn't pressed for time so planned to go there by bike, and it all went well! I took the bike I had repaired a few days earlier, no problems with the repair or the bike at all.

There was some traffic congestion heading into the city, and I made my planned 12:30 train from Southern Cross station to Waurn Ponds with about a minute to spare.  Whew!  That meant I didn't get to the right carriage to accommodate my bike, but I managed to make do with an empty corner of the carriage I got into. All this was less drama than I had on a similar trip 18 months ago: then the side panel of my bike fell out, and I needed to buy more bulldog clips to hold it together!

Navigation from Waurn Ponds was better too.  Turned left instead of right at Ghazepore Road, and it runs almost all the way to Bellbrae, but with the odd gravel section (Ok) and hilly gravel section (get off and walk the front wheel drive leaning trike, no real drama).

Quite hungry by the time I reached Urquarts Bluff, and I wolfed down some left over Thai takeaway, then it was on to Airey's Inlet where I was staying. The bakery (woohoo) was open and I bought donuts, cheesecake and bread.  The donuts were enough to stop the immediate hunger.

After a day or so (I managed to get some surfing in and caught up with a few friends out in the water) it was time to head back, and took a few photos on the way.  The potential roadside free feed this time is the Brassica weed as discussed in a previous post.  It seems to be everywhere from the empty railway land near Southern Cross station to the roadsides of the Great Ocean road, and my pic is of it thriving in a small crack near the Bellbrae roundabout.

Uneventful trip home, with plenty of time for correct bike stowing on the train, I got back quite refreshed.

Regards

Steve Nurse

Thursday, September 6, 2018

Tailbox Repair

Trike in for repair with lots of.....

clamps on the back to ensure the glue takes hold.
Inside of the tailbox after repair.  The small brown part in the centre is a splint glued into place as a repair to the split timber underneath.
Hi, after overloading my tailbox about a week ago, its all fixed now.  this involved cleaning its inside, then carefully glueing it back together.  All fixed, this is the 2nd repair to this tailbox.  I have been using this trike as an all-purpose ute, and keeping the one that is for sale on ebay in good condition.

Regards

Steve Nurse

Sunday, September 2, 2018

Velocino Continued

Almost finished, this is with the handlebars folded.

First Mission included retrieving a teapot from a junk pile


Overloaded Recumbent

Cleaning up the drill press

Ceres metal, .....

bike tube and bike tyre recycling. Woohoo!
Hi, in the last few days I have fixed up the Velocino and had it on the road for a short test run this afternoon.  This included custom 3d printing a light enclosure and using it to plug the front frame tube. It goes quite well, and I think the above seat steering does a good job, allowing me to lean forward on the handlebars for improved aerodynamics, but its not quite classic Velocino . There is still quite a bit I can do with this bike which is quite fun to ride.  I should be able to make a wooden chainguard and have been working out how to make that in my head.

In other news I visited the Ceres bike shed where they have recycling facilities for bike tyres, and donated a drill press I had bought in Germany in about 1987 to the Wecycle bike shed.  I initially attempted to haul the drill to Wecycle by trike but I only lasted 2 streets before having to return home tail between my legs having broken the tailbox with all the weight.  No permanent damage done I hope.

Regards  Steve Nurse