|
| Tailbox plan starts as dxf file. |
 |
| On the bike route to Spacetank. I think this is more sculpture than garden maintenance equipment. |
 |
| Parked outside a nice house in Coburg. The trike leaning against the fence has a version of the tailbox I am building at Spacetank. |
 |
| Starting work on the tailbox, gluing lower frame ...... |
 |
| reinforcements. |
 |
| Painting the inside. |
 |
| Glueing and.... |
 |
| prepping the side plate reinforcements. |
 |
| Screwing them into place |
 |
| Workbench. |
 |
| Finished sideplate corners. |
 |
| Sean tried the trike at lunchtime. |
 |
| Assembling lower spacer. |
 |
| Holding parts in place. |
 |
| Ducks at Coburg Lake. |
 |
| Another rider on the bikepath. |
 |
| Water tank for soaking prior to bending is folded corflute |
 |
| Base held in place..... |
 |
| by clamps and string. |

 |
| Tailbox is built up around some central pieces. |

 |
| Clamping and glueing seat in plate. |


 |
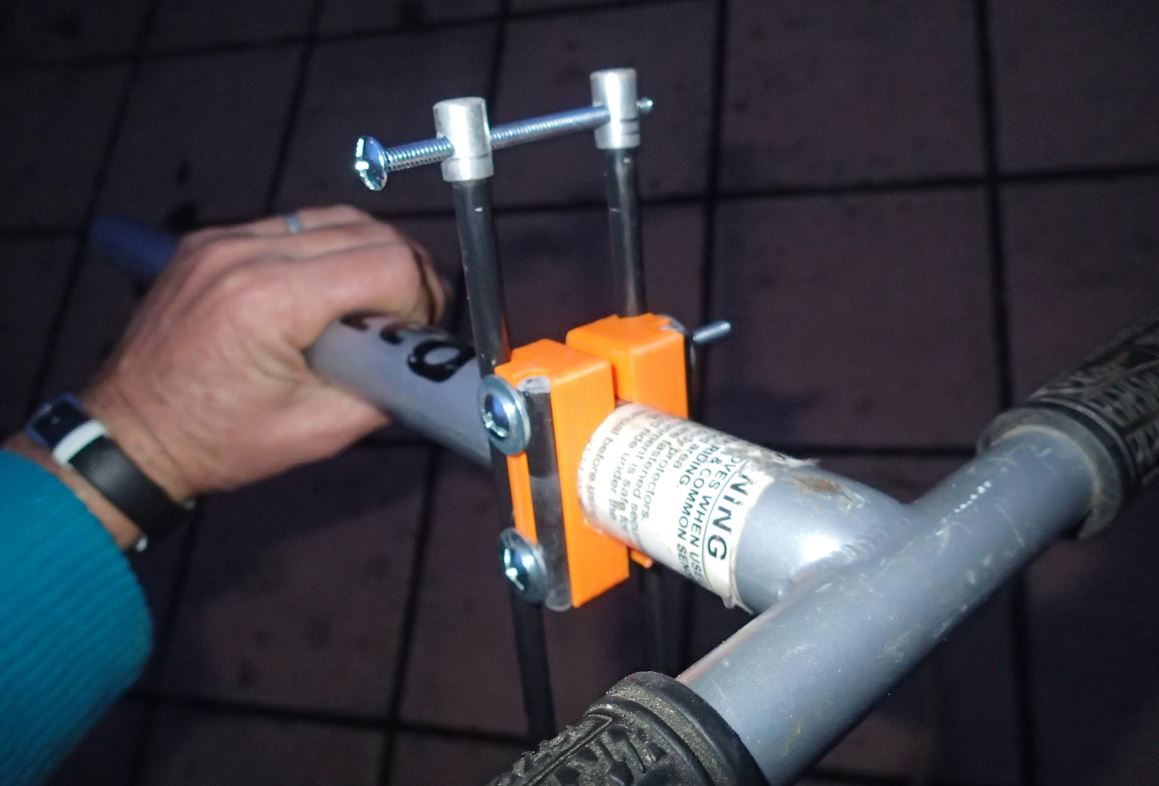
| Adding m6 T-nuts which become the seat clamps. |


 |
| Structural backbone of tailbox is..... |
 |
| epoxy glued (red, at sides and next to tabs in long part) and bolted together in 3 places (blue) |
 |
| Seat is cable tied to centre and side plates at top..... |
 |
| and glued and screwed to other parts below. Note top reinforcing plate where seat is vulnerable. |
 |
| After securing bottom plate in place, it is glued. Then holes are fully sealed with waterproof builders filler. Part acts as large rear mudguard when done and should be waterproof from below. |
 |
| Back plate and top of bottom plate is cable tied. Note clips with 1 handle removed holding white corflute sidepanel. |
 |
| Bottom plate glued |
 |
| Clip at top is..... |
 |
| Protected by bridge |
 |
| Timber sidepanels, 8 bridges per sidepanel |
 |
| Bridges on sidepanels |
 |
| An early test ride taking no-longer-wanted dvds to the opshop |
Hi A few weeks ago, I completed design of a tailbox for my leaning trikes. I've built plenty of these before and honestly have enough already but wanted to make something with a refined, complete design that other people could build, and document it along the way. My short term plan for the bike design is to put a plan to build it on the internet by September 12, and exhibit it in Fringe Furniture which begins at about the same time. The trike uses 3d printed and cast parts as well as the tailbox, and its possible parts like the bearing housings could be 3d printed, so the design can be played with a bit.
Anyway, I decided to do the bulk of the build at Spacetank Studio. They are not far from where we live and a CNC routing business Sean and Horn is attached to them. As well, I'd met a few Spacetank artists like Rain Gidley and Dani Storm at last years fringe festival, and they seemed like a reasonable bunch to hang out with.
The Studio space was $90 per day which I thought reasonable and as well there was a safety and training fee. I used the bandsaw and benchspace at Spacetank, plus the closeness of the workshop to Sean and Horn. At home my shed is tiny and I appreciate the room at Spacetank.
Here's an approximate diary.
Day 1: Picked up 2 sheets of 4mm birch ply from Plyco, then drove it over to Sean and Horn and left it there. Birch is a bit cheaper than Hoop Pine Marine Ply which is a bit more waterproof than birch. But I varnish the birch thoroughly anyway, the birch ply looks ok.
Day 2: Rode over to Spacetank. Sean and Horn let you pick the parts off the routing table and that saves a bit of money. So I did that with my parts which had already been cut, then went and spoke to Holger upstairs about arrangements for the next few days.
Day 3: Rode over to Spacetank. Raining but its bike tracks almost all the way there so I didn't have to stress with traffic. There was a good safety briefing first off. Started off cutting out parts on the bandsaw, then waterproofing parts that would later be inside the box. Glued some parts together. Met Rain, Dani and a few others which was good.
Day 4: Drove over to Coburg again and started by dipping some parts which needed bending in a tank, then set up a couple of box pieces on an aluminium trike frame to build the rest of the box around. I took a few photos but not enough and with too much stuff in the background to consider the photos to be good enough. (For a photo of the tank I used see the top photo here, no photos of it this time around) The base and seat top in particular are bent a lot, and they need to be string tied, cable tied or clamped to the centre frame pieces before gluing into place. I got most of this done by the end of the day and drove home happy with the car laden with seats and the tank.
Overall I'm happy with the way things worked out. There were 2 days or so of finishing the boxes off including the sidepanels and painting. I've been riding a trike with one of the new tailboxes fitted, and its comfortable enough even without cushioning. The 4mm side panels are very rubust, and the clips holding them on work well.
This post continues on here, describing some corflute panels which suit this tailbox.
I'll enter a trike in Fringe Furniture 33 along with another design and will work on the entries over the next week.
Update April 2 2020, added extra photos to show more assembly details.The cutting file is now free on the net through this link, https://www.thingiverse.com/thing:4201871
Regards
Steve Nurse