News and Events

Keep up to date with the latest news and events of Modular Bikes.

Saturday, February 19, 2022

Fixing Bike 49, Malvern Star


Hi

There wasn't much wrong with this bike when it came from our helper Jill. It came with bike 43 I think. Work on upgrading included spraying handlebars black, regreasing the bottom bracket and front wheel and a general clean.

With several other bikes to fix at home, I took the line of least resistance and moved it on by giving it away on the Clifton Hill Good Karma network facebook page. Once adverised it only lasted about 20 min out the front.

Closing in on my target of 50 bikes repaired! Regards  Steve Nurse

PS, its take as well as give, here is a guitar being picked up from the same network a few days ago.


Tuesday, February 15, 2022

Fixing the recumbent bike part 3, trike to bike conversion


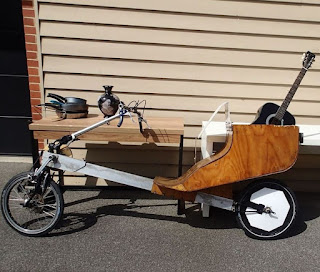
First trip after rebirth, to the grog shop of course.

Jigging to hold nut in place before it is brazed on. A nut at each end stops the red spacers from sliding.

Rear fork assembly.

All put together

2 rear frames of bike. there are 4 altogether, front fork, front frame, mid frame and rear fork.

Rear wheel on

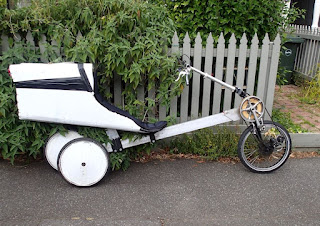
Switcheroo from trike

to bike without tailbox to bike with tailbox as shown below. Note mud marks from 2 trike wheels on tailbox.

2nd trip on new bike. Our local Facebook Good Karma Network advertised this for free, and I was quick to head out the door to snap it up. It will replace one stolen from the Wecycle bike shed where I volunteer.


Hi

Managed to ride the recumbent bike today. I have been repairing and hopefully improving it since it broke 5 weeks ago . There is still a bit of work to go on this part of the resto, after which I hope to refurb and make new some tailboxes.

Plan to paint the rear fork, fit lights to the dyno hub, and add some fairings to the rear wheel frame. As always, will report more later.

Regards

Steve Nurse

Holland Bike


As found. It is a classic barn find bike except I found it under a nearby railway bridge,

complete with vegetation growing

through the back wheel.

Mid surgery. Cotter pins were a write-off.

Working!  I took it for a ride like this, riding 2 bikes at once and delivering one of them (the Uptown) to Wecycle as a free bike for the needy. Back brake only fitted. It stops the bike. Glacially!

At my new work, back2bikes. I sourced the new back wheel from the back2bikes dumpster. Cotter pins were from Wecycle, and replacement spokes from De Ver. Spokes represented the entire budget for the bike sofar. $6.00!


Hi

This is my latest bike project. I don't collect every bike I see abandoned in the area but a fair few! Anyway, this Holland has been one of the latest, and maybe its a keeper. The back wheel and cotter pins were write-offs, with the back wheel badly buckled and spokes stuck hard to spoke nipples, and cotter pin threads stripped.

Anyway in a sort-of treasure hunt process I managed to find the right bits to fix it. Might fit a rack, and make a chainguard. The one found with it is a complete piece of crap, suitable only as a garden ornament.

Regards


Steve Nurse

Monday, February 7, 2022

Fixing the recumbent bike part 2


Jigging the rear fork

Wheel removed, ready for the next lot of brazing

Small magnets and red 3d printed housings.

Decided to use the head of allen bolts as the retainer, the diameter was right. Couldn't find a washer the right size and didn't want to drill any bigger.

Turning off the end of the allen bolt to make a washer.

Hi

Have been working on the rear fork of my bike over the last few days, and here are the progress pics. In general I am avoiding drilling of the for something that led to its predecessor's demise.

Regards

Steve Nurse

Evening update: A few more photos of progress below. The suspension blocks are now secured to the fork with positioning washers on the fork and holding magnets on the blocks.

There's still some work to do:

3d printed spacers to keep the fork tongue in the same plane as the frame, and suspension blocks from rotating.

Edge on rear fork to ensure generator wire runs smoothly for frame

Pin on fork to secure it in frame.

I will adapt an aluminium frame to suit the new fork but that will be not much work.

Almost done

Suspension block is

secured by magnets and pinned in place by a braze on washer.

2 suspension blocks made this way, this is the front one.


Tuesday, February 1, 2022

Fixing the recumbent bike part 1


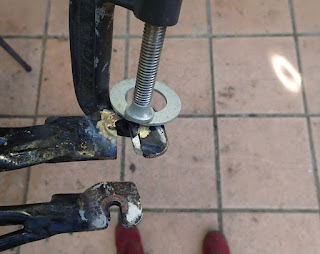
Some hand sawn horseshoe shaped washers bolted in place to

rework the rear fork I had made previously. Central square parts are thicker mild steel, replacing thin chromolly.

After brazing the horseshoe washers in each side, I filled in the inside of the slot with part of an old bolt. This is the clamping before brazing.

The dropouts part of the fork is done. Still a bit more to do till the whole fork is complete though.


Hi

For a week or so I've been reworking and renewing the rear fork on my recumbent bike. It broke, and fixing it became part of my bike plans for the year.

Anyway, I'm well into the fixing process, and am quite happy with results sofar. I should be able to rebuild the rear fork without drilling into it which I'm pleased about. Last time the fork broke at least partly due to stress concentrations from drilling.

 For the rebuild I have ordered some magnets to hold the rubber suspension blocks on with. They are coming soon and I will report.

Regards Steve Nurse

Saturday, January 22, 2022

Tilting Trike frame 2


Trike as finished last time - after riding it up a nearby gravelly hill, I found the frame to be too short which meant more weight on the back wheels and less on the driving front. The front wheel slipped a bit on the bigger hills but I used it to check out some testing sites for a model raft.

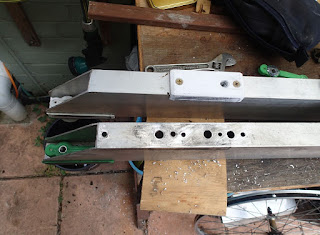
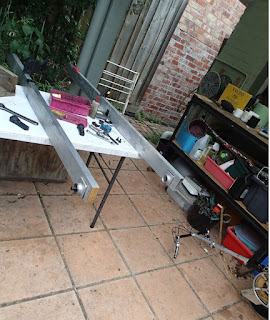
So I pulled the frame out of this trike and drilled out some extra holes to make

the frame compatible with the front half shown in the top pic.

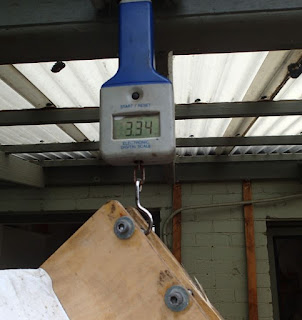
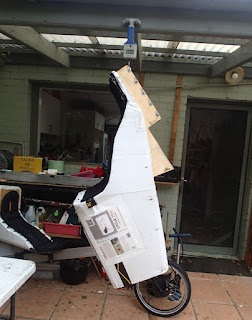
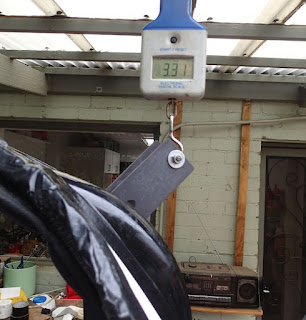
Weight of timber-based seat and tailbox

Timber box

Weight of fibreglass based tailbox as shown in top pic, just the same!

Wheel Switcheroo

Trike as it is now. Frame is about 80mm longer  which means better hill climbing on gravel. 


Hi

Some more switching this week, I had found the new frame I had made to be too short and did a bit of tweaking on a slightly longer one to replace it. As well, on disassembly, I found a printed lug part of the fibreglass-based seat was damaged. 

So now my "fast trike" has both the frame and tailbox from my previous fast trike as shown immedaitely above.

There was hardly any weight difference between the timber- and fibreglass- based seat and tailbox combos, but I think the fireglass one was more aero. I think I know what to do to improve the timber based tailbox. 

* Remove a bit of timber where its not needed to make it lighter.

* Redo the coreflute at the back and make sure there are no sharp edges - minimum radius 75mm on lower and upper edges.

* Ultimately I might get all - new timber made for the tailbox. If I start from scratch, I should be able to make it better again. The original design was all timber without corflute at the back which is great for shopping, and what I have now is a lighter hack of that.

A few more things to do now!  Regards


Steve nurse

Thursday, January 20, 2022

Fixing Bike 48, Uptown

Cog swap done

The reaction arm holder, outside and....

Inside

Almost done, the back handbrake was later stripped away.

The old wheel. This clutch seemed almost impossible to remove, and there was a broken spoke on the clutch side as well as rim warping, so the wheel was well and truly a write off. 

The bike had been round the side of the house for a while and an edible weed had grown up through the front wheel.


 Hi

This 99 bikes Uptown has been round the house for a while, and it came from hard rubbish in Ramsden Street originally I think. Its a single speed, and I looked at it when I got it and found the back wheel to be warped, then put it round the side of the house.

Wanting to move it on, I looked at again last week and found an unfixable broken spoke, so went looking for a new wheel to replace the broken one. I found it at Wecycle, and it had a small cog on it meaning the gear would be high on the bike. I swapped the gear over, and made a reaction arm holder for the wheel from galvanised steel strip.

So its on the road now and I'll take it up to Wecycle to be donated on in a week or 2. It still could do with a bit of a clean up.

Regards Steve Nurse

Sunday, January 16, 2022

Tilting trike frame

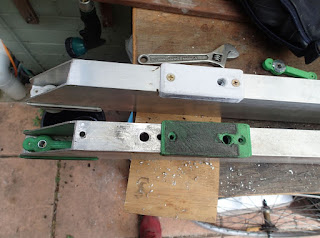
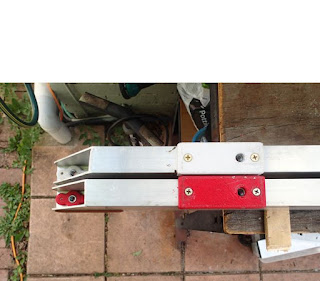
Bike frame has white parts and

new frame has red parts. I printed the brown part fresh.

Raw drilled hole for rear trike axle and holesaw.

Trike without seat

First trip, to a local takeaway for

Takeaway Thai food


Hi

As I posted last time, I planned to make a convertible section for the bike I had made earlier to convert it to a trike. So I have done this now, and the pics show details. It has only taken a few days, and today I rode the trike for the first time. It goes well but is possibly not as fast as the bike I made earlier. 

Steps to make the trike were: 

Remove seat and rear aluminium frame from bike. The steel rear wheelframe from the bike was broken but everything else is ok.
Gather parts. I had just about everything but printed one spacer. Complete plans for the trike are here on thingiverse, including the spacer.  
Cut aluminium frame, this was just 2 cuts, one at 45 degrees, the other square.

Fit printed parts at front. These hold the 2 front frame sections apart.

Holesaw holes for rear axle

Fit rear axle parts. This includes crush bars to stop the centre of the frame from distorting. 

Add wheels, attach seat . Go!

At the moment I'm not sure about the seat mounts, so I may work on that or swap the seat out. Soon I will repair the steel bike frame, and that is already in progress.

Regards

Steve Nurse