News and Events

Keep up to date with the latest news and events of Modular Bikes.

Sunday, July 3, 2011

Building a new bike, Part 4


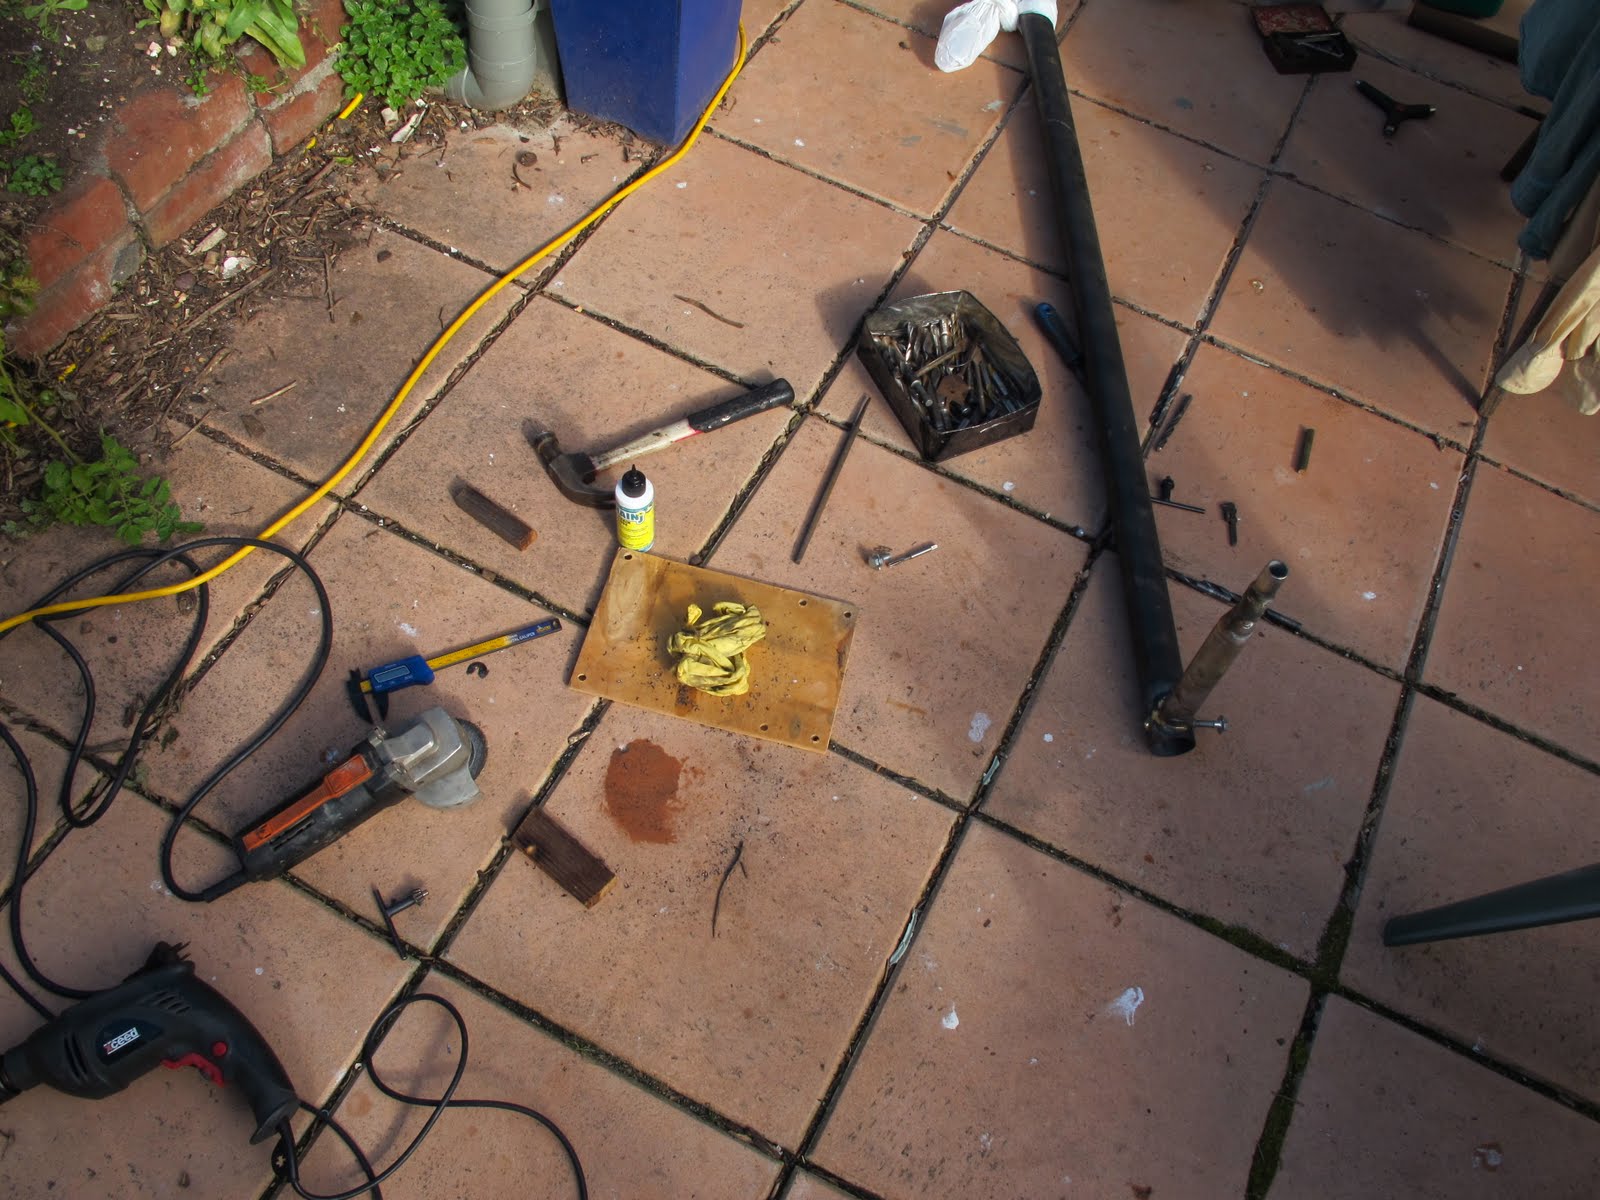
A wet and wintry day in Melbourne and a day spent mostly around home except for a small excursion or two on the bike. My son Ewan was home and he helped me a bit with the bike building, he was temporarily employed as a human vice grip, holding some parts in place with pliers while I welded.

So today's progress has been good and I "only" have the seat and steering and corflute box left to do.

* Brazed V - brake bosses on behind the front fork.
* Bought a 14-28t cluster for the front and ordered a tyre for the back.
* Very happy with the way the mini v-brakes fit on. Cabling will be very minimalist and I still have quite good (15mm or so) clearances from the brakes to the front wheel. Front wheel can be standard 700c with no special hub for disc brake: as light and as aero as you wanna go!
* Also happy with the suspension and top seat clamp arrangement, on my current bike, its a mess with lots of extra and unnecessary parts.

All for now, on the road within 2 weeks, all going well.

Regards

Steve Nurse

Saturday, July 2, 2011

Building a new Bike Part 3


Hi It's Saturday today and I've made quite a lot of progress on the bike. The mini-v brakes arrived during the week and that let me set up the steerer tube and bottom bracket shell one night last week. Last time I wrote, I'd just started on the rear triangle: after several hours today, that is all complete. The work involves cutting tubes of chromoly steel and brazing them together. As well the holes in the precut laser parts needed a bit of enlarging to fit tubes at odd angles. I made about 20 "suspension blocks" from old bicycle tubes and these seem to do a good job as a suspension block.

Before starting on the suspension blocks, I made a wad punch for putting the hole in the centre of the blocks. This is a piece of chromolly tube with the wall made very thin and sharp all the way round. To make the blocks, you find an old bike tube, then cut square lengths, wad punch a hole through and finally cut a small triangle off each of the corners. I'll try to get a better photo of the suspension later. For the monent I'm very pleased, way lighter and simpler than the arrangement on my current bike.

All for Now!

Sunday, June 26, 2011

Builing a new bike Part 2


So here we go with a few photos of the progress I've made on the bike.

* The parts for the suspension pivot were made, these are some pieces of M8 tapped brass rod housed in some 12.7 od * 1.6mm wall erw tube.
* After a bit of scrounging I find a seatpost from an old folding bike that I can use as the back part of the frame but its not quite long enough. I cut up another seatpost to extend the part, then assemble the whole lot in the frame. Then its all brazed together.
* A couple of sticks of 12.7 od *1mm wall chromolly tube are cut to length and flattened at the end, then drilled. A couple of furniture leg anchors are brazed in and we hava a pretty good start on the rear triangle.

All for now. Mini - v - brakes arriving soon, with them I'll be able to sort out the front end of the bike.

Wednesday, June 22, 2011

Building a new Bike Part 1


Hi After a break of a year or two, I have started building a new bike. (If you've got my book, "an Illustrated guide to the cycle zoo", then the build process is for one of the bikes shown in the on-line "long wheelbase plans"). And , truth be known, it won't be all that different from the last one (big at the front) I built but I am including a Schlumpf Mountain drive in the bike this time. When I last ordered laser cut parts for one of these bikes, I ordered 3 sets, so it's just a matter of pulling some of these parts from the shed.

A friend rang up and said he had some old bike bits he was chucking out and I could grab them if I wanted. There were 700c wheels, a frame, some pedals, lots of cantilever brake bits and they're a good set of parts. At about the same time, I contacted Greenspeed about buying in a Schlumpf mountain drive. This is a gearbox that has the form of a standard crankset but includes a standard 1:1 drive and a 2.5x reduction gear. After about two weeks, several emails and a few phonecalls and a considerable lightening of the cheque book the parts arrived. So that's most of the bits needed to start.

First step in making the bike was to remove the steerer tube from the donor frame. Although this frame was quite nice, show no mercy is the motto and after removing the fork, I ripped into it with a pipe cutter, hacksaw and angle grinder. Next is bending the front fork, the forks must be widened to fit a back wheel.

At this stage, I put the front wheel, fork, and steerer tube into the main frame. This is to check how the clearances for the crankset will be. I decide that the v-brakes I try out are a bit big (aim is to have the frame fairly low on the steerer) and decide that mini v's would be the go. A couple of local bike shops don't have any, so I order 2 sets through bicyclestore.com.au . Hopefully they will arrive soon!

Yesterday, I put a small chamfer on boltholes of one of the schlumpf trouser guards (I will have one ring each side of the 42t chainring) so the bolt head will stay central in the hole. This evening I put the chainring and trouser guards onto the Schlumpf and lastly for this post, work out the gear inches for the bike. Lets say I get an 11-32 teeth cluster.

Top is 105", lowest is 14.5", range is 730%. I have been getting round with a 7 speed for qite a while now, the schlumpf should make things much easier.

All for now.

Steve Nurse

Thursday, June 2, 2011

3d Printing: A Shed for the 21st Century, part 1

3d printers have been around for a while but up till recently have been used mainly for rapid prototyping . This is a commercial, industrial process used to make one off or small sets of parts for which tooling will later exist. The tooling itself is expensive but the rapid prototypes have been relatively inexpensive and made by specialist rapid prototyping houses like Formero . Rapid prototypes are a way of completely evaluating a part and averting the disaster of a badly or wrongly made tool. So that was it for quite a while, at least for most of my career as an engineer. But now the genie is slowly coming out of the bottle.

Whereas previously rapid prototypes were relatively inexpensive, we are now coming in to an age where 3d printers (the things that make the prototypes or parts) are relatively inexpensive. Costs have come down from upwards of $20,000 a few years ago to below $1000 today. An industry that did not exist a few years ago (home 3d printing) is starting to thrive today. If the costs of 3d printers come down at the same rate as the cost of (say) laser printers then we will all have one in our house in 10 years. I attended a seminar on 3d printers today and as one industry player put it: "kids will print out some game tokens on a 3d printer, play games with them all day, and then eat them." The good thing about inexpensive 3d printers is that the mobs that sell them are not the big guys, and some of the ones in production now were built and started in garages. See http://www.additive3d.com/3dpr_cht.htm. A very new and good looking product is the Ultimaker.

About 20 years ago, "desktop publishing" was something quite special and carried with it the notion that we could print 1 or 100 of a printed page at home - and previously this had been the domain of large offices and professional printers. Now many of us just have computers and printers and we do stuff with them. And eventually 3d printing will come to be the same, just a commonplace.

So why the title for this blog post? 3d printers fit inside a modern house or bedroom or flat which may not have a real shed or even space for one. They are capable of making almost any small object that can be designed in 3d cad: personalized gifts a specialty! The skills needed to use them are computer skills which kids these days are more likely to develop than traditional shed skills like welding, brazing, lathe work etc. And so we have making stuff, in a small space, and people will know how to do it. A shed for the 21st Century.

More to come in this series. A commentary on the PAMF 3d printing / additive manufacturing conference is next.

Recumbent Bike v. 7:09 to Glen Waverley

Well from the title you would probably guess that this post is about some sort of race of bike v. train but in fact the title is about a reliability trial. This page will be a blog within a blog about catching a Melbourne train to get to work one or two days a week. Not very exciting I hear you say. But this particlular train has such an apalling record for punctuality that I consider it to be "almost a work of fiction".

The 7:09 from Richmond to Glen Waverly is the "new as of May 8 timetable" equivalent of the 7:13 to Glen Waverly. The 7:13 was a limited express train stopping only at 5 of the 15 or so stations on the route and seemingly perfect for me to get to work. And yeah, it was pretty good. The 7:13 was occasionally cancelled but the next train usually arrived 2 minutes later and although it was not an express, it usually arrived on time.

So here we go, the blog within a blog thing. Writing about the recent past here but I hope to update this every day that I go to work by bike (15k plus 35k on the way home) and train (20k) from now on. To be fair to the train, I will compare its reliability to that of my home-built recumbent bike. And also to be fair, I must admit to getting lost on the way home a few weeks ago due to a damaged bridge on a bike path: I score myself a lowly 3/10 for this ride!

May 25 2011:
Train: 7:09 from Glen Waverly arrives but due to a switching mistake wound up on the wrong train line and ended up at Hawthorn station on the wrong line. Passengers were advised to change trains and return to Burnley. There was a train right opposite and we were advised to take that, but it didn't wait for us! Several long waits later and I arrive at Glen Waverly too late to get to work on time and about an hour after the 7:09 would have arrived.
Train: 4/10
Bike: No Problems. 9/10

June 1 2011:
Train: 7:09 to Glen Waverly is cancelled and the next train is delayed 8 minutes or so. About 30 minutes late at Glen Waverly. I started talking to a guy who usually catches the same train - about how unreliable the service is.
Train: 6/10 Bike: No Problems. 9/10

June 3 2011:
There was a tailwind behind me on the way to the train station, so as the old adage goes - "I came by bike, but I flew" and got to the train station in time for the 7:03 train. And it looked like the 7:09 to Glen Waverly was going to run on time. I used the time on the train to pump up the back tyre, tighten the front light, reposition the speedo and move the handlebars and start reading Von Ryan's Express.
Train: 9/10, Bike a bit lop sided: 8/10

June 10 2011
Well I arrived at Richmond station about 4 past 7 and was in plenty of time for the 7:09 to Glen Waverley - had it arrived. But it didn't. The next train arrived pretty much on time and I was about 20 minutes late at GlenWaverley. I caught the train home as well as I had to work a bit late and didn't want to ride in the dark the whole way home.
Train: 6.5/10, Bike went fine: 9/10

June 16 2011
It was a cold morning, and I set off under a blood red, eclipsing moon. Oh, I forgot, this is a blog not the start of the great Australian novel. Anyway, it was cold and I was reliably informed there was an eclipse of the moon somewhere, but I didn't see it, hidden behind a building or something.

I had a good run to the station but couldn't validate my 10 x 2 hour zone 1 and 2 card in the machine and just kept going anyway. The 3 past 7 train arrived on time, and I was spared the trauma of waiting for the 7:09. But just as I thought everything was going along all plain vanilla, some ticket inspectors got on. A few people bailed it from the train when they saw the inspectors and there was quite an argument between a homeless guy and the inspectors.

I sat, nonchalantly waving my ticket in the air, hoping the inspectors would not bother to look at it. This ploy did not work, they looked at my ticket, believed me and I didn't have to pay a fine. Arrived on time at Glen Waverley, but maybe it's time for me to invest in a relatively indestructable Myki card thing.
Train: 10/10,
Bike is a bit wonky 8/10.

June 24, 2011
On the way to the station and just near the top of the hill in Nicholson St. , I almost run into a couple of tradesman wandering through a roundabout with a wheelbarrow. Manage to stop in time. "dude!" I yell "dude". "Sorry Bro" says one of the guys.

Soon after that I remember I have some coins in my wallet and can use the small "R2D2" coin only ticket machine at the back of the station and don't need to go round the front of the station and buy a ticket from an attendant or the "Darth Vader" coin and note machine. So I save myself a minute or two and can catch the 3 past 7 to Glen Waverley. I'm reading Huntingtower by John Buchan and, under the influence of the SBS TV show "go back to where you came from" I had seen the night before, start singing Tom Petty's "You Don't Have to Live Like a Refugee" on the bike on the way to work. (When you are imitating Tom Petty, you have to sing like your nose is blocked off.)
Train: 9/10, Bike: 9/10, Go Back to Where You Came From: 10/10

June 28, 2011
Without going in to too much detail, I got onto a Lilydale train when expecting a Glen Waverley train and ended up at Laburnum. After that I caught a train back to Richmond when keeping on going and changing trains at Ringwood for Bayswater would have got me fairly near to work. So I will share some of the bad points.
Train: 5/10 Bike: No Problems 9/10 My Thinking a bit rusty, 5/10

July 6, 2011
Not too much to report. Left home in time to catch the fairly reliable 7:03. Bought a Myki card.
Train & Bike: No Problems, 9/10

July 13, 2011
Ride all the way to work and avoid the train altogether. I get wet and some of my work bits of paper get wet. No great disater but something I could live without.
Bike: No big problems, 8/10

July 20, 2011
Ride to the station and use my Myki card for the first time. It works, and lo and behold, the 7:09 train to Glen Waverly arrives on time. And I decide that at this time, the blog about this particular train has run its course. I will use this blog space to write about something else inane or profound, depending on what comes along. I'll revive the subjects of trains and punctuality should something significant happen on my commute. Like I'm abducted by aliens.
Train 10/10, bike still a bit wobbly, 9/10
Signing Off for now.

Steve Nurse


Thursday, April 21, 2011

Why I bought a recumbent bike part 2.


Well, we are actually venturing into other topic areas here, but having named the first part of my story "why I bought a recumbent bike part 1", I seem somewhat obliged to continue with a title in that series, although really this post is more about "what I did with my Performer recumbent bike once I bought it". "Stop rabbitting on about nothing, I hear you say, start telling us something, we don't care what the #*&^%( title of the #(57@^%$ blog post is." Well I hear you. Yes. Stop rabbitting on. Yes. Now.

The recumbent bike I bought is a disc brake high racer. The original spec for the bike is on the net at http://www.performer.com.tw/2010/user/product_2.php?wp=05&sno=00064. I believe the bike would be very good value bought new and has nice things like a hollow, lightweight crankset, neat cable runs, boots on the brake cables to stop water entry, twist grip shifters, light wheelset with aero spokes and high end disc brakes. Overall, it's quite light.

Unfortunately a few things needed fixing on the bike before I could consider it to be good to ride on the road. The fixing took place over several months but I'm writing this a few weeks after I'd finally fixed things so will compress it all a bit.

The Seat

As supplied by the bloke I bought the bike from, the seat on the bike was propped up quite high on a set of metal stilts. Nicely done but a bit heavy. I removed all the existing seat propping and put the seat back on. It seemed a bit low at the back, so I used a couple of sawn up pieces of nylon and long bolts to prop up the back. Alex Mcnee who sells Performer bikes from Canberra recommended something similar and told me he has some "custom" bits to help do the same job. His contact details are on the Performer website,
http://www.performer.com.tw/2010/user/partner.php?wp=03

The Steering

As supplied the steering was a foreshortened version of the original Performer steering which had a "Boomerang" type handlebar and the steerer leaning out over the belly. This makes the bike a bit harder to get on and off and harder to relax when you're sitting on it. So I jumped in and started to replace the handlebars to be a bit more like those on Barchettas or Pete Heal's Lizard cycles. The bars are powdercoated black alloy and came from Abbotsford Cycles, http://abbotsfordcycles.com.au/public/content/view/14/29/ . This process needed all the cables to be changed and some rerouted. I needed a tandem brake cable (again from Abbotsford Cycles) to reach the back brake and added a bell and mirror. For now the seat and steering combination are quite comfortable.

Visibility and Storage

For a long time I have ridden my home-made recumbent bikes and usually I have a white tailbox fitted at the back. The tailbox makes the bike more visible, especially from behind. As supplied the bike was all black and I had a feeling that car drivers would just not see it, especially at night. Just to make the bike "roadworthy", and before I'd intalled the tailbox, I slung an old safety vest over seat.

The need to carry stuff can hardly ever be divorced from bikeriding. I know that people get away with riding with just a cycling shirt with a pocket on the back and a bottle carrier on the frame. But this is all very la-de-dah and impractical and I like to be able to carry at least as much as I need for a commute to work, that is, a change of clothes and a small briefcase. The recumbent bike allows this to be done in a storage space that makes the bike go faster, not slower. The aerodynamics of this tailbox make the top part of the body less bluff and able to slip through the air easier. Lower down, the seat is already quite reclined and does a good job of aerodynamics anyway.

To construct the tailbox, I used plastic fluteboard / coreflute, which is available without too much fuss and in a variety of thicknesses from Bunnings. At the top of the box (actually built into the lid) and mounted on to the seat, I have made a small wooden frame. The tailbox is about 30 cm (or hip-width) wide which is wider than the seat itself. When there is a load in the tailbox, the fluteboard stretches. Without the wooden frame at the top, it would distort where it meets the seat and possibly sag onto the back wheel. And oh no, that would never do. Apart from fluteboard all you will need to make a tailbox are cable ties and a few household tools.

Saturday, April 16, 2011

OzHPV Challenge 2011

The OzHpv Challenge 2011 was held in the NSW / Victoria border town of Wodonga over the weekend of 9 and 10 of April. The Challenge races are unique in my experience: they are open to a wide range of abilities, ages and vehicles and the emphasis is on fun as much as winning. Tim Marquardt was the main organiser and this was the first event I have attended as President of OzHpv. And I stand by every word I've said about the races in the past: a great event and well worth attending for all cycle enthusiasts and cycling families, whether or not you are interested in human powered vehicles. The results that I know are Mens: Malcolm Butler 1, Jamie Friday 2 Women's: Laura Houghton 1, Faye Downing 2 Juniors: Bryce Marquardt 1 but we were all winners on the day. Personally I had a great Challenge. Some of my photos and videos came out very well, I won the shopping race and came second in the go to whoa on a bike I'd designed and made myself. My wife Christine had a good time and made a great contribution, sponsoring a race and organising certificates for race winners. Thanks to all the volunteers and sponsors, especially Kim from Cruzbike, Alex from Natural Speed Engine and Ken from Trisled who all helped out extensively. Ken was really in the spirit of things, riding a dragster in some of the races, supporting his daughter in others and timing and helping out wherever he could. Alex competed fiercely and the Performer bikes he sells were the predominant brand on the track. Kim brought up a large shelter which served as "officials' hq" for the event and happily demonstrated his Cruzbikes throughout the event. He also kindly loaned Jamie Friday a wheel which got him going in the events. A lot of the discussion of the Challenge has been on discussion groups like the "members only" OzHPV mailing list, http://sports.groups.yahoo.com/group/ozhpv/ : here are a few links to photos and videos about the Challenge. I'm in a few of the videos, the "orange shirt guy" at the end of Andrew's video and the beginning of Pete's video. Regards Steve Nurse From Peter Heal "My Challenge videos are here: http://www.youtube.com/watch?v=HJ3ccNX8Mb8 and http://www.youtube.com/watch?v=krOT9wBQ_8Q Some still pics http://s81.photobucket.com/albums/j211/PoiterH/Challenge%202011/ Thank you linesmen, thank you sponsors." My 3 videos http://www.youtube.com/watch?v=kHvjkqBQJLQ http://www.youtube.com/watch?v=DojLYBqSjBo http://www.youtube.com/watch?v=D_hzuqDkNwo Andrew Stewart's video http://www.youtube.com/watch?v=f08b2pwgUjc. " From Malcolm "the champion" Butler: "And here are my photos: http://malb.org/OzHpvChallenge2011 "